What odds and sods will you need as a Beginner to Fly Fishing? You already have the rod and reel. Maybe even the fly line. But what else do you need?
You may not believe it, but you should be able to compile the absolute essentials for your first trip for next to nothing based on what you already have in the house and a few other suggestions.
We’ll assume you’ve got the rod and reel. And thank you if it’s a Cadence Fly Fishing set up. You’ll be well looked after.
The aim of this two part series is to go through the minefield of the other bits and pieces you will need to start out on what is likely to become your new passion. And there are many.
It is advisable to be sensible about this, as there is one unknown that needs to be considered — you might not like it.
Do not spend a fortune on something you may end up regretting.
The likelihood is you will absolutely love it and get completely immersed in the whole process, like the rest of us. But for the purposes of these articles, we are going to assume there are two main buying stages:
Part One (what this article is about) — Items you absolutely have to have on your first trip into fly-fishing. The non-negotiable items that need to be bought before you cast your first line. I have tried to keep it realistic in terms of what to spend. As with everything in life, there are very cheap options and gold-plated versions. In general, you can consider the gold-plated once you have decided you want to take fly-fishing up more seriously. But occasionally the bargain-basement is all you need. Or even better, something you already own. Hopefully, these are discussed in enough detail to help you decide.
Part Two (article two) — Nearly essential items you will have to buy when you wake up through the night thinking of fishing. In other words, you have decided it is for you. Most of these would be handy to have on your first trip, but you can easily do without them while you suss things out. It may mean you are less efficient and tasks will take a little longer on your first trip, but you can save spending on these items until you are sure.
There is also a Part Three in theory, which is best defined as the rest of your angling life. This is where you accumulate mountains of seemingly essential tackle over and above what is sensible. Most of these items will barely see the light of day, and I am certainly not going to open that hornet’s nest at this stage. But I am fairly confident you will join that club.
Following on from these two parts on tackle, there is also one coming on what to do on your first day’s fishing. What should you expect, and what is expected of you at a fishery? All the unmentioned things outside of fishing that the newcomer may not be aware of but needs to know. Watch out for that on the Cadence Fly Fishing Facebook page.
After this, have a read of Dan O Neill’s excellent blog to get you started on casting, alongside plenty of other stuff we are doing for beginners. Not just in written format, but also on our Cadence Fly Fishing YouTube channel.
We’ve got stuff upcoming on how to retrieve, top fly patterns and much more that should help get you going if everything seems a blur.
If you haven’t even got as far as the rod yet, check out the blog on Choosing the Right Fly Rod here. But in summary, it’s a 10ft #8.
Fly Line
Free if you buy a Cadence Rod. Maximum Price £130. Minimum Price £10.
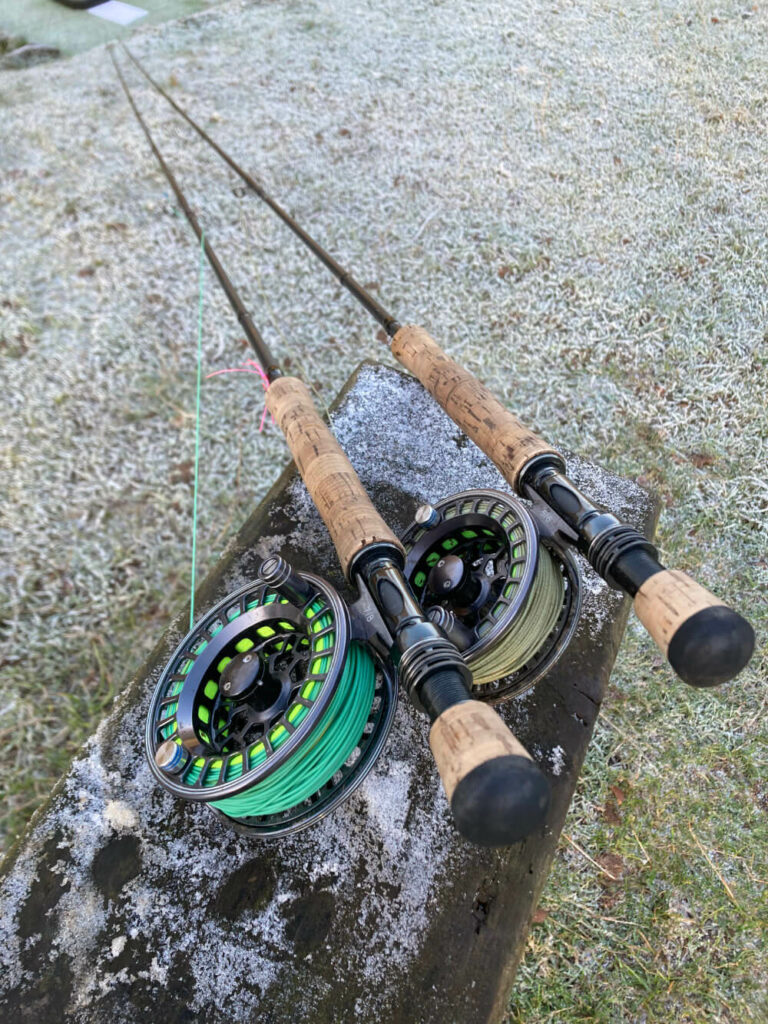
These form the longest discussion point, so I will explain some things you should not buy and try to give you a basic understanding of some keywords you may hear.
The absolute unavoidable is that you need one.
As you’re just beginning, you should only buy a floating line to start with. You may have heard of sinking lines, and they are very useful, but for now, keep it simple. A floating line is versatile and easier to learn to cast with.
There are various tapers of floating line around. This basically means there are thicker (heavier) and thinner (lighter weight) bits at different parts on the line. Or tapers. All have their uses in different situations.
Your first fly line should be a Weight Forward (WF). And truth be told, there’s a good chance you won’t ever buy anything else your whole fishing life. Weight forwards are perfect all-rounders.
To explain tapers, first understand it is the weight of the fly line that loads (bends) the rod that then causes it to cast. The more weight and speed in the line, the further it will go.
At the extreme end of the scale, there are very heavily front loaded examples called Spey lines. To understand the whole concept, think of a lead weight and tie it to a long length of string. Gently start to swing the string and gradually build momentum using the lead weight. And then let it go.
What happens? The lead goes flying off into the distance and, simply because it’s tied to it, pulls many yards of string with it. The lead will land with a massive splash. And that very simply is a heavily front loaded fly line. Avoid this to start with. They absolutely have their place, but not for you just yet.
Now melt this lead down and spread it out over the first few yards of the string rather than tying it to the end and let it dry. You can still build momentum up. And the weight of the lead will still pull the thinner string behind out a fair distance. But because the weight is spread out, it won’t land on the water with such a splash. This is a weight forward.
In your head, you will think distance is crucial, but we also have to think about scaring fish. The meet in the middle is the weight forward.
There are also lines called double taper that don’t cast as far. These land like dandelion fluff and are great for delicate presentation.
All have their uses, but for now, we remain focussed on the basic weight forward.
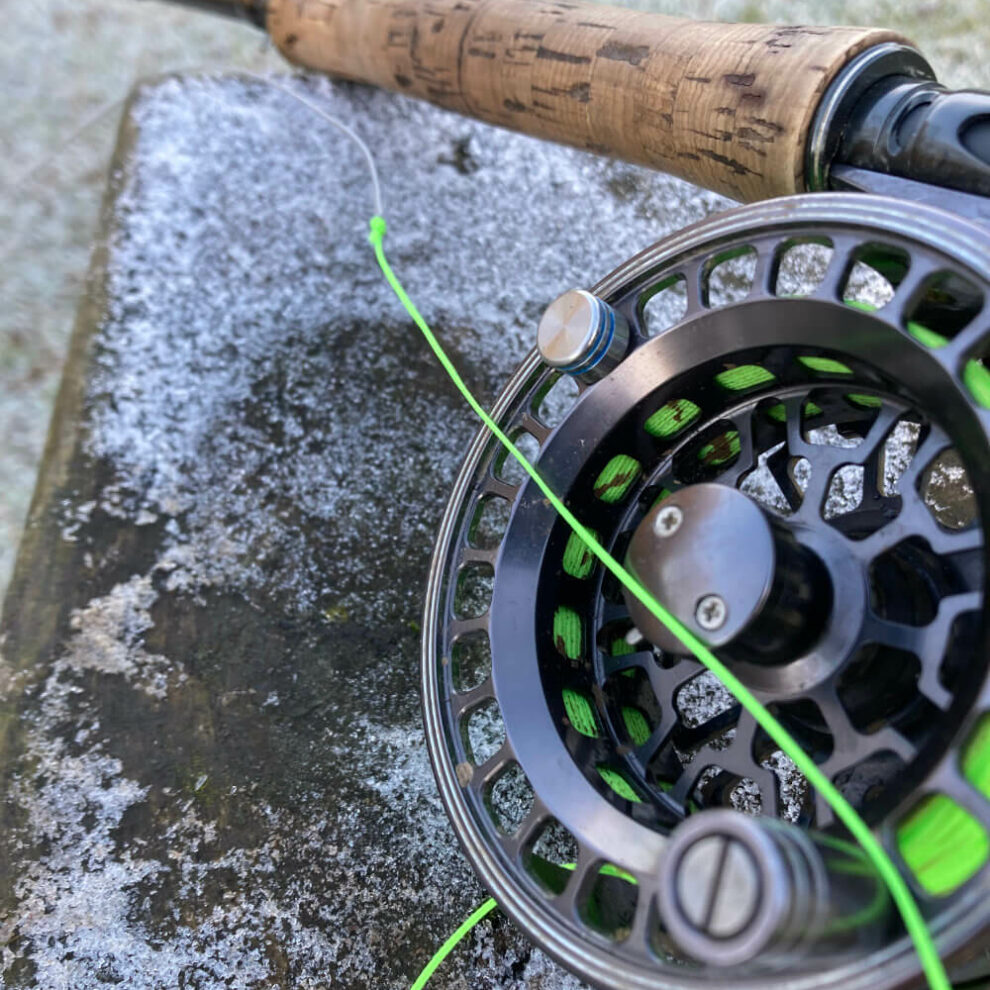
To buy the correct line, have a look just above the cork handle on your rod. It will most likely have written AFTM 7-8 or #7/8 or just #8. Or any other number below that. The number is the crucial thing. You can read up about AFTM another day.
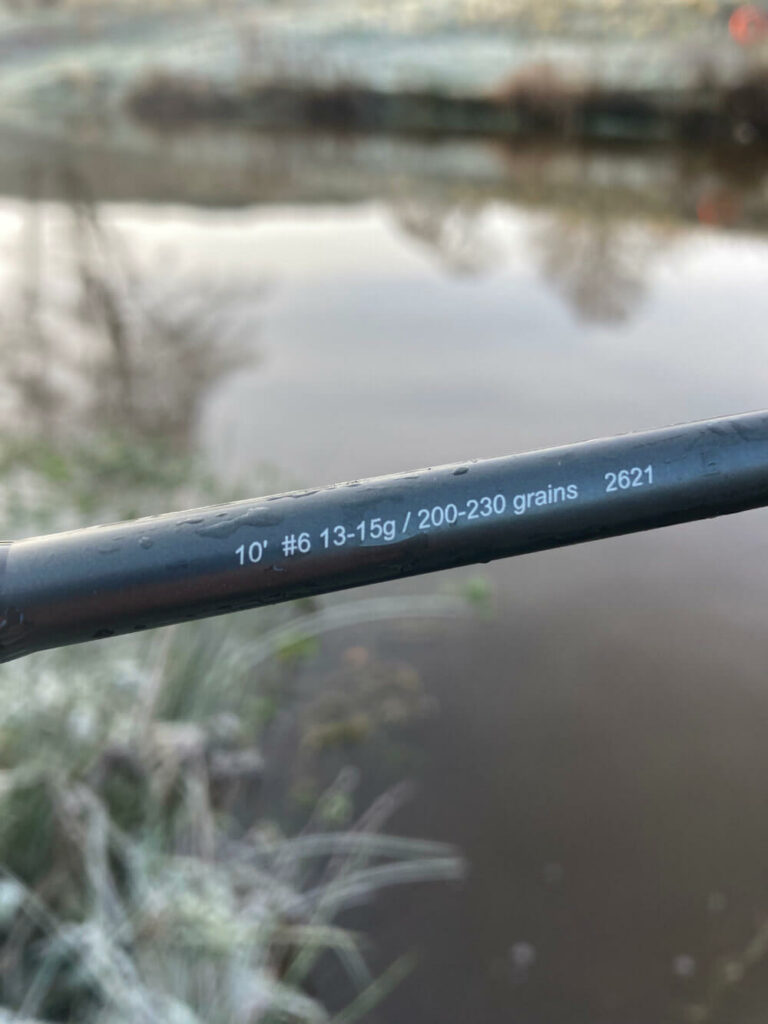
The number is the weight of line that matches the rod. In all the three examples above, you would buy a WF8F line (Weight Forward 8 Floater).
For rods that have two numbers, the higher number is relevant to weight forwards. The lower number may suggest the rating for a double taper line.
All Cadence Fly lines were developed at the same time as the Cadence Rods and match perfectly. As an added bonus, we also give the fly line free with the rod. So, if you don’t already have a rod…
Cadence Fly lines also tick the next box. Not all Fly lines will.
Welded loops. And ideally a welded loop at each end of the fly line. A welded loop means you can just tie things directly to the fly line with a straightforward knot. Without a welded loop, you have to spend a lot more time tying more complicated knots and going a bit Blue Peter with glue and such like.
On the subject of which, learn one knot that covers nearly all eventualities. The Uni Knot. (Also known as the Grinner knot). YouTube is full of examples.
Backing
£6 for the first trip.
Buy 100yds of 30lb Dacron. Or any other thing called fly line backing. You will hardly ever need it, but backing is an essential insurance policy just in case a fish runs so far you run out of fly line. Not many fish will do that. But the one that can will be your best fish of the year.
Backing is a rot proof (ish) line that can sit behind a damp fly line for years without being cleaned and not crumple like wet kitchen roll when really needed.
It’s hard spending money on things that are barely going to see the light of day. But all that pain will be rewarded when you hook the gammon flank you’ve dreamed of.
Imagine the fish running for the hills and you see the fly line running out. Your only option is to jam down, and the likely outcome is the sheer force will pull or straighten the hook. Buy some backing, even though it’s virtually guaranteed you will not need it on your first trip.
Avoid getting bogged down in the best type – anything described as fly line backing will do fine. You might upgrade at a later date, but a basic own brand version will be fine. A brief look online and you should easily find something for around £6.
Tie this backing to the spool of the fly reel with an arbor knot — very similar to, if not actually, a Uni Knot. But with a little granny knot tied in the end. YouTube is your friend here as well.
100yds of backing will be more than enough. But you may find 100yds overloads the spool and causes the reel to jam. Trial and error, basically. Some reels will easily hold 100yds. Some may just accept 50yds plus the fly line.
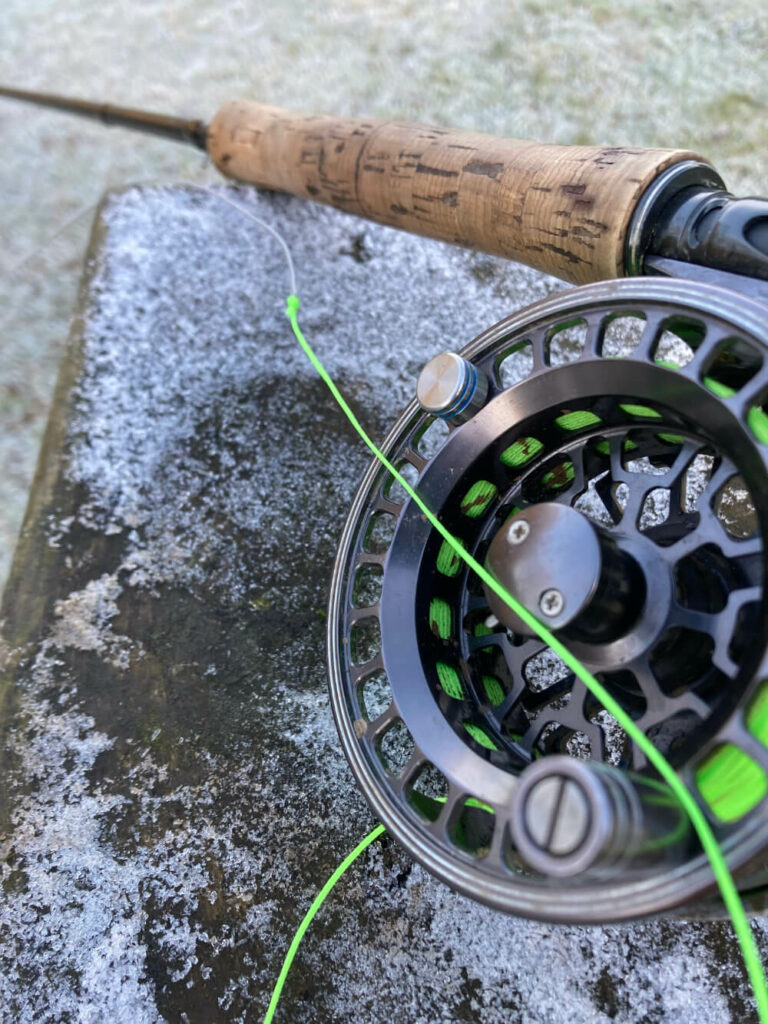
Once you have your backing loaded onto the reel, uni knot the backing to the welded loop of the fly line. It is crucial you attach to the welded loop that has a sticker just above it that says ‘this end to reel’ to the backing. Otherwise, you will have the fly line the wrong way around and will not be able to cast properly. The welded loop without the sticker is the one you tie your leader and flies to.
Keep the fly line on the spool it was supplied on, and get someone to put a pencil in the central hole (which may be covered up with a sticker). Wind directly off the spool so it’s revolving around the pencil like a wheel (after removing the pipe cleaners) and resist the temptation to drop the fly line loose on the floor without help. It’ll end up twisted and tangled.
Leader Material
Spend £6 on one spool to start with. £31.50 long term.
Why do you need it? You’ve probably worked that out, but put simply, you can’t tie little flies direct to the fly line. And if you could, the fly line would be way too visible to the fish. So we need a buffer. Something to link the fly line to the fly that is strong enough to hold a fish but as invisible as possible.
For the best overall balance as a beginner, you should uni knot 10ft of 7.6lb Fluorocarbon to your welded loop. To save measuring it, that will work out at roughly two full arm spans of line. Depending on your wingspan, obviously.
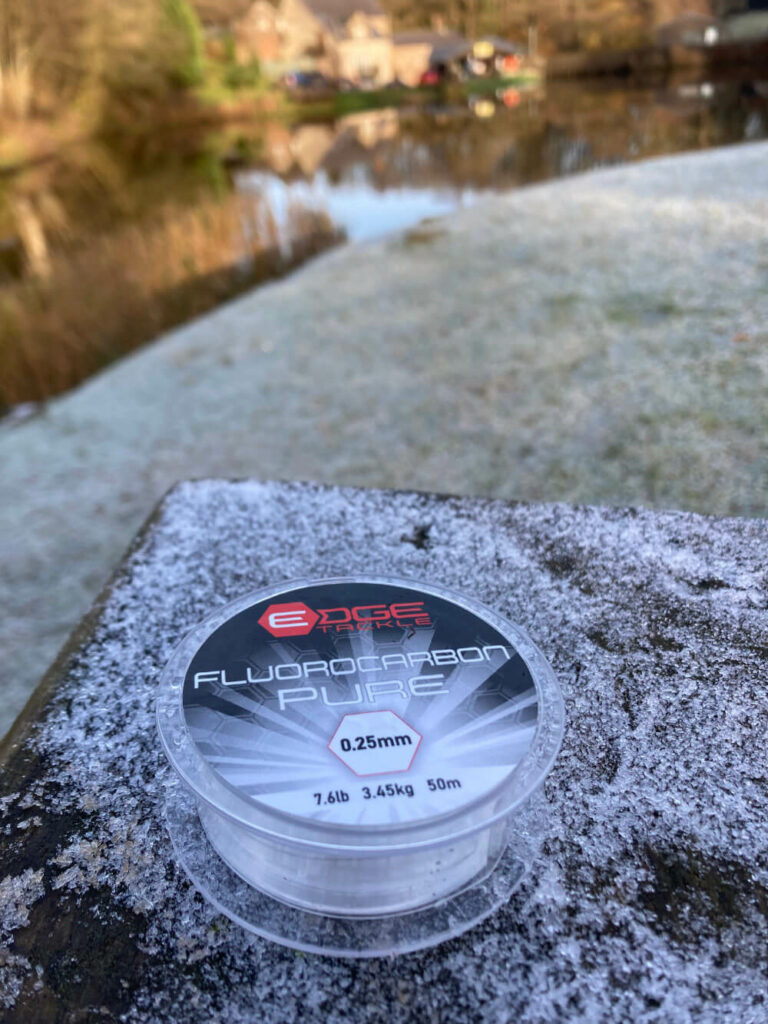
You will no doubt be bamboozled with all the copolymer, monofilament, or fluorocarbon available. Go to edgetackle.co.uk and order six spools of their Fluorocarbon Pure. 3 x 7.6lb and 3 x 6.6lb once you have decided to go all in on fly-fishing. That will cover you for the next year. To start with, just buy a single spool of line rated around 7lb.
Edge Tackle line is one of several 100% pure fluorocarbons available but at half the price for 50m instead of some alternative shop bought versions at well over £10 it’s a no-brainer for me!
Just like Cadence Fly Fishing, Edge Tackle don’t sell in the shops, so there is no mark up. It is all online. That’s why the like for like with similar quality products has such a large price difference. It may be ever so slightly harder to obtain, but the effort will save you a fortune without sacrificing quality.
The one item of tackle you will replace more than anything else over the year is leader material. So it makes sense to source the best you can at the very best price. Buying six spools gets you free postage as well.
So what is the difference between the types of line?
Basically, fluorocarbon is thinner and harder wearing than monofilament or copolymer. In theory, the thinner the line, the more it is disguised from the fish. This does matter. They do see line, and it can be a reason not to take your fly.
But the drawback comes when you use too light a leader material, which the fish can snap more often than not. For most trout fishing in the UK, you will be covered by lines ranging from 3lb up to 12lb, with the best all-rounder being around 5 to 8lb.
Thinner line also allows a lighter and more natural fall of the fly. Conversely, it is easier to damage and not as hard wearing during casting.
Leader material is all about balance with the fish you are fishing for, the rod you are using and the size of hook you have on. For now, just go with something either side of 7lb. They’re the ones I use for 80% of my fishing and will start you off perfectly.
You might also ask why monofilament and copolymer exist.
Firstly, monofilament is the old-fashioned name for normal fishing line. Single stranded stuff people like me used just after the Mary Rose went down. Copolymer is a couple of strands and has similar properties to monofilament.
Overall, they have more stretch than fluorocarbon. They also float better, but are thicker pound for pound. And they are softer than fluorocarbon, as well as quite a bit cheaper.
I have been tending to use Copolymer and monofilament more for dry fly-fishing, but you can use them for sub surface stuff as well.
The overall balance most would agree is that fluorocarbon is the best overall, though.
Leader set up can be advanced or as simple as you want. Some tapering you may read about really helps presentation, leader length also matters in time, but that is Chapter 12 of the starting out in fly-fishing book. In Chapter 1 we are just going to use 10ft of one type of line.
Tackle Storage
£0 for your first trip. £30 to £300 if you go full-time.
You need something to carry all these odds and sods around in. There are four main options in UK stillwater fishing to consider: Seat box, fly-fishing waistcoat, bum bag/chest pack and shoulder bag.
Seat Box
Many people use a seat box. The type made by Shakespeare being the main one. These have so many advantages beyond something to carry your tackle in. Work on about £50.
Firstly, they keep your tackle bone dry.
Second, and most important, you can also sit on them after casting. Not only is this more comfortable, but it keeps you off the skyline. Moving shapes on a skyline scare fish, so you catch more if remaining as hidden as possible. Sitting down is one of the best ways of doing this.
The drawbacks are seat boxes can be bulky to move around and a bit more of a pain to access your stuff. Most people get around this by having the regularly used items (nippers, forceps and floatant — see below) on their coat and the not so often used stuff in the box.
Waistcoat
The fly-fishing waistcoat is something that goes over your jumper or coat. It’s a multi-pocketed vest with lots of cleverly designed additions for optimum access to tools.
The waistcoat is used by many anglers for good reason. The main ones being ease of access, lack of bulk and the fact you never have to pick it up or put it down. It’s always on you, and you remain perfectly mobile. Think about going to a river. You’d struggle with a seat box as you move from pool to pool and wade out into the river. Perhaps the seat box is more of a Stillwater thing then? Definitely go for the waistcoat if you are likely to fish a river as well.
Drawbacks with the waistcoat are it can get wet through in heavy rain, although some are more waterproof than others. You also have limited storage space compared to a seat box. And the waistcoat can pull on your neck when overloaded.
(Overloading is something you do after you’ve fished a long time and bought too much stuff).
Consider a waistcoat if you are unlikely to carry lots of fly-fishing junk. As a complete beginner, you are unlikely to have spare spools and lines, so this may be the best option after your first two or three sessions.
The truth is you will probably end up having all the options in time, but to start off, a waistcoat may be best.
Bum bag/Chest pack
It’s an option, but one I’d avoid when you are completely new.
After 40 years of fly-fishing, I’ve qualified as ‘in it for the long haul’ and a Fishpond waist belt contraption is my preferred method of storage. Chest packs do similar. These can cost over £200, so they are probably the most expensive option.
Plus points are the weight distribution. They don’t pull down if filled too much. Access to tackle is instant and in some case the bag can be slid around your back out the way, so your fly line doesn’t get caught up on it when fishing.
I’m going to class this as a plus and a minus point. But storage is limited.
Minus because you can’t take the kitchen sink. Positive because you discipline yourself to carry less around and become more mobile.
They can also get wet in heavy rain, and the bum bag will get soaked if you wade too deep.
It’s by far the most comfortable method I’ve found. There are still times I will use a waistcoat and quite honestly I am erring towards using a seat box more now as kneeling to keep off the skyline is becoming a bit more tricky with knackered knees. 90% of the time I use a waist pack, though. And quite honestly, absolutely love it.
Avoid the bum bag/chest pack option as a new starter, however. A waistcoat can be bought for much less. But it was an option that had to be discussed.
Shoulder Bag
Still many in use, and probably something for the traditionalist. The shoulder bag scores low on practicality and often on storage space (but not always). But it has a place, as it’s easy enough to carry and stores everything in one place. Some of them can be gorgeous in an antique kind of way. Despite being easy to carry over your shoulder, some people will put them around their torso to keep mobile, which can get a little uncomfortable.
It may be you inherited a shoulder bag from someone who has stopped fishing, and it will serve you perfectly well to begin with. It is more fishing friendly than what follows as it will have pockets more suitable to fishing, along with some handy additional storage. I’d probably avoid buying one brand new personally, but understand why some folk like them. You should not have to fork out much more than £30 or £40 to buy a new one. £150 for the real fancy ones.
And finally, there is the cheapest option of all not listed above. A carrier bag.
Seriously.
Just put your stuff in a carrier for the first few trips.
It’s a pain to move around, stuff can get mixed up, but it’ll keep everything together.
At the end of the day, your main objective when brand new to the sport is to concentrate on how to cast and fish. Not maximise your catch. Nor maximise access to nippers. A carrier bag will do a great job. A rucksack if you’re feeling posh. It’ll also help you understand why all the other options are better in the long term as you rummage around for a spool of line that’s disappeared to the bottom of the bag. Easy access is key long term, but not on your first-ever trip.
It’s not perfect, but it’s enough to get you started.
If you’re determined to treat yourself, go for the waistcoat, which you can probably get for £50 to £60. Much pricier are available.
Landing Net
£0 for your first trip. £50 if you go full-time.
Play this carefully and you won’t need to buy a net to start off with, as some — but not all fisheries — supply their own landing nets.
Using a landing net to bring your fish in is an absolute non-negotiable unless the fish are tiny. On day ticket stillwaters, the fish will not be small enough to swing in, so you need to find out if your target fishery supply them before you travel.
In the north east of England where I fish, waters like Chatton, New Mills and Thrunton all supply nets at no extra cost. There will be enough to go around, so there’s no need to book one. You just pick it up on your way to the lake (they’re generally stood up in a barrel between the payment point and the lake).
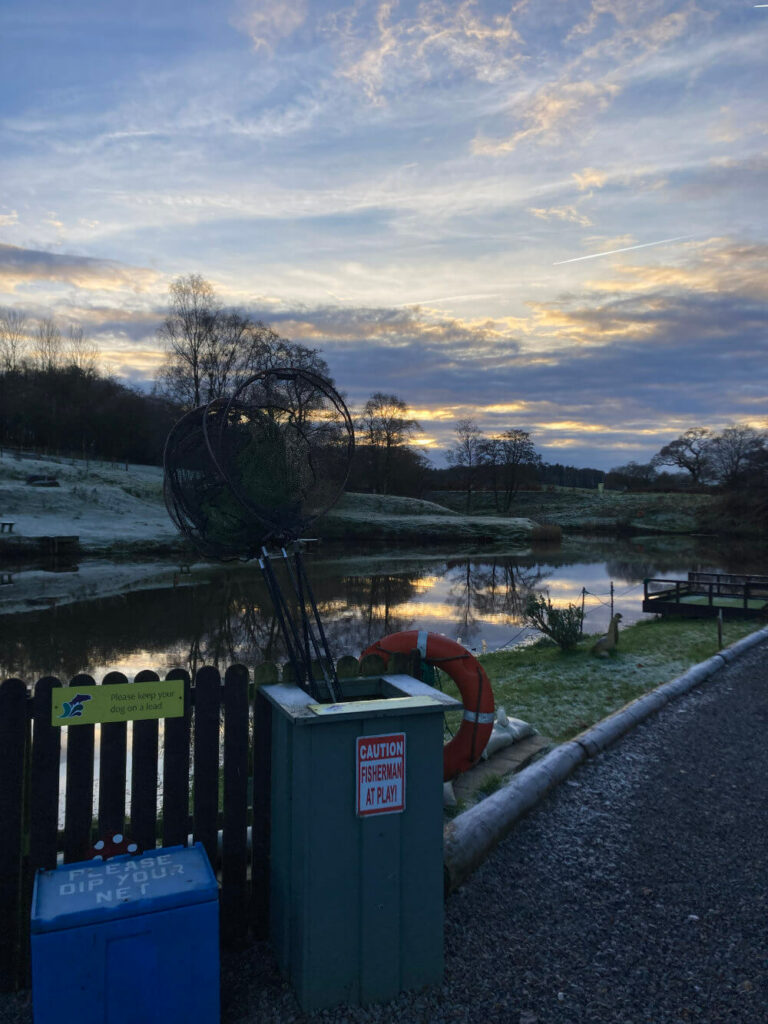
So why is it essential you have a net? Fish welfare basically.
And the small matter of actually getting the fish in.
At some point in the fight, the fish will tire and come to the surface. It’s now you would draw it over the net.
If you don’t have a net, the fight becomes prolonged, and you may have to beach the fish on dry land and that may damage it.
Lifting it up with your hands is a no no because the fish will slip out of your grasp most likely, plus human hands on fish bodies causes long-term damage if you are returning them. (In the event you have to handle a fish, make sure your hands are wet first).
It’s far better for all concerned if you can drop the fish into a net, keep the net in the water and unhook the fish while it’s in the water without touching its body. Then you just let it have a breather and gently let it out to swim off.
If you have to buy yourself a net, get one with rubber mesh. And one where the mesh is small. If you get a mesh that has huge gaps, fins can get in and split. Like splitting the webbing on your fingers.
Ideally, you want a net with a structured shape. Like the screw in variety. You will get at the fish far easier to unhook.
Collapsible nets are fine if you intend to keep the fish, but they aren’t much good for catch and release. The net bag can be so baggy the fish can get tangled up, and it becomes a bit of a pantomime getting the hook out. Which is really unfair on the fish.
A basic net pole and screw in head is great. The type made by Greys, Cadence and a few others. £50 should just about do it.
You can also get a structured net from the likes of McLean or Wychwood that are a lot more portable and can be clipped to your back. These cost quite a lot more, but there is a bit more to them in terms of mobility.
Purely for starting out, I’d recommend going to a fishery that has its own nets and avoid buying one to start with.
Flies
£20 to start with. Unlimited if you go full-time.
Everyone’s favourite subject.
Which can border on addiction.
If you don’t catch one afternoon, but someone has caught five in the same time on an Apps Worm, it’s a racing certainty you’ll be ordering some of the very same that night.
And that is how the fascination begins.
Some days you might out fish other people and find yourself ordering some more of the same killer fly in case you run out.
It’s never ending. So it may help you to get to know a fly tier at your local fishery. I would strongly recommend buying flies from one of these people rather than the mass-produced factory made things, even though in value for money terms, factory ones are more than fairly priced.
It’s a subtle difference, but someone who fishes and ties flies will think about how the fly fishes in the water. You may hit lucky with the factory versions, but I would strongly suggest using a local tier and paying more for a well thought out fly. They can also make things to order if you fancy a particular colour or amendment.
And now comes the obvious question. Which flies do I buy for my first outing?
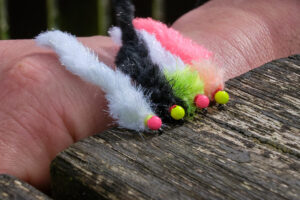
And the answer will be different whoever you ask. But for the purposes of getting you up and running, I’d certainly have a handful of white Cats Whiskers.
In the same order, throw in a couple of Blue Flashback Damsels, a red Apps Worm and a Diawl Bach or two.
That’ll do you for starters.
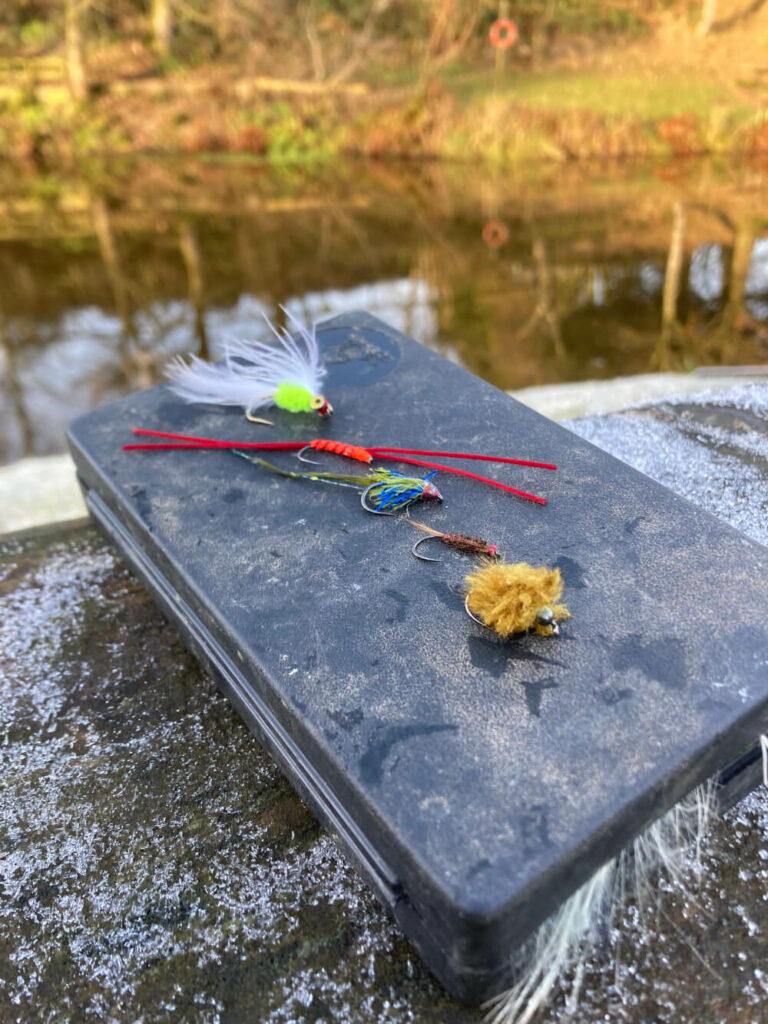
If the fishery sells flies at the counter, I’ll virtually guarantee you’ll buy a few of those with your day ticket as well. And that will be your first step to becoming a fly hoover.
Obviously, you will need flies for your first trip, so these must be bought. You can’t avoid this one.
Personally, I never use anything but Barbless hooks for trout fishing now. It’s probably not a bad idea to start as you mean to go on, as most smallwater fisheries ban barbed hooks anyway. And if you are caught using them, you’ll be asked to leave the fishery. So I see very little point in buying barbed.
To explain, barbed hooks will stay in the fish more reliably than a barbless hook. You can make mistakes playing a fish with barbed, and it will remain in place when a barbless would simply fall out.
But returning trout caught on a barbed hook is a no no as it causes too much damage that can worsen in the days after release. Think of it like this — would you rather unhook a barbed or a barbless hook from your own arm? And which would leave the bigger mess?
Provided you keep a tight line after hooking the fish, barbless hooks are fine and do much less damage to the fish.
Polaroid sunglasses
£0 for your first trip if you own any type of glasses. Any price you want thereafter. £15 to £200.
You will obviously be physically able to fish without sunglasses on. But these are an absolute non-negotiable at any stage of your fly-fishing career for two reasons. You have to have them for your first trip and every trip thereafter.
First, they protect your eyes from flies that are flying round at the speed of a bullet. When a fly goes in your eye, it may well bury. Which is very graphic, I know, but you can’t mess with your vision. Skin and flesh can repair and scar. You don’t have that option with your eyes. There are thousands of horror stories. Do not be one of them. Any form of glasses will be better than none. Even if they are not the polaroid type. Just wear something that offers a physical shield.
Secondly, if you buy glasses with the word polaroid in the title, that type of lens will reduce the glare of the water surface and actually allow you to see the fish much more clearly. This will definitely catch you more fish over time.
You can spend a fortune on glasses. But to begin, there are some absolute basics that do the job perfectly for your first few trips. And costs very little. So little, I think my back-up pairs for lessons were a fiver each. If they aren’t available, any more, you should be able to get some for £15. The absolute key word is polaroid, though.
Forceps/Scissors
£0 for your first trip. £10 to 25 if you go full time.
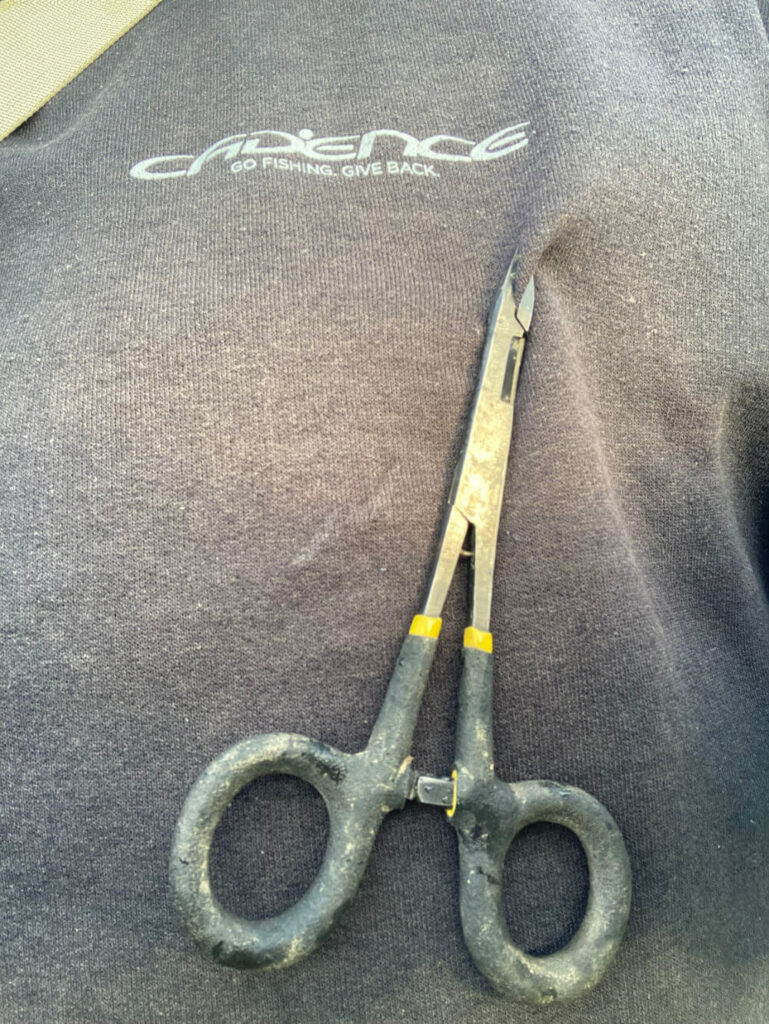
Unfortunately, a must-have even for your first trip. If you are returning fish, you will need forceps to take the hook out occasionally. It’s unfair on the fish to suddenly find it has taken the fly well down in its mouth, and you can’t get at it with your fingers.
Trout teeth are pretty sharp, so once you feel those, you will avoid putting your hand in there. Forceps are essential for solving this problem, and should not cost a fortune. A basic pair of forceps can be bought for £5. And if you have a set of electrical pliers in the garage, these will do you just fine to start with and in theory add £0 to your first trip total. Anything with a fairly fine tip is great.
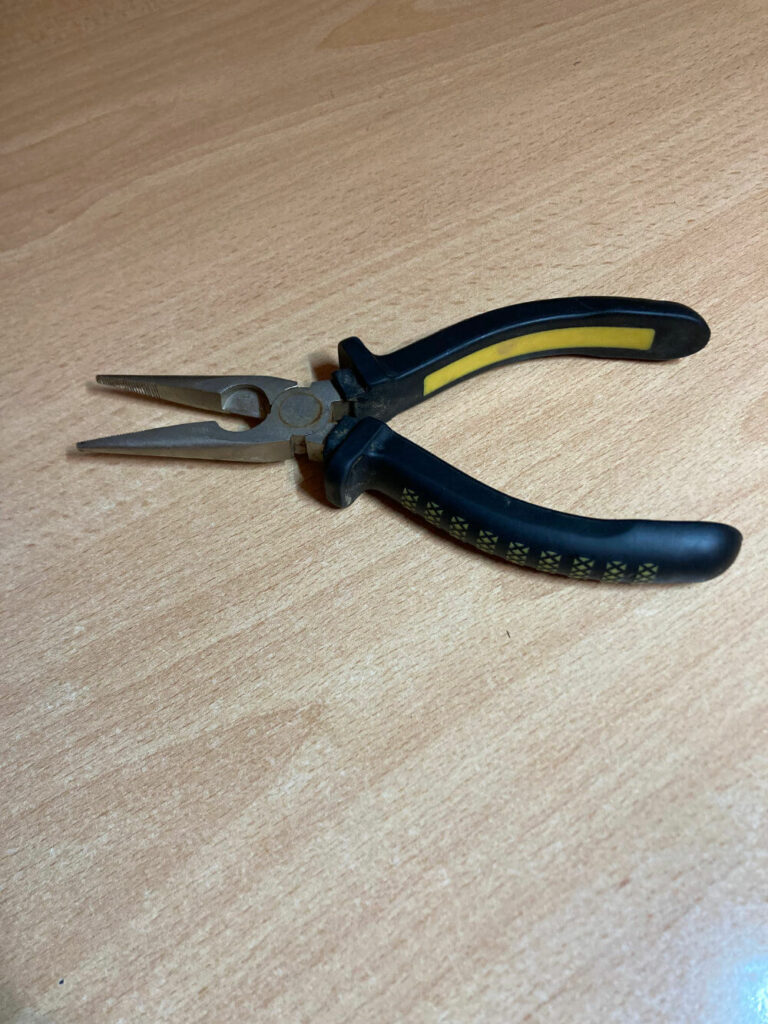
You can get a couple of bonus features on fancy forceps to save buying other items further down the line. The Loon ones I have are forceps/pliers at the tip and then change to scissors halfway up the blade. If you have scissors on your pliers, you technically don’t need the nippers below.
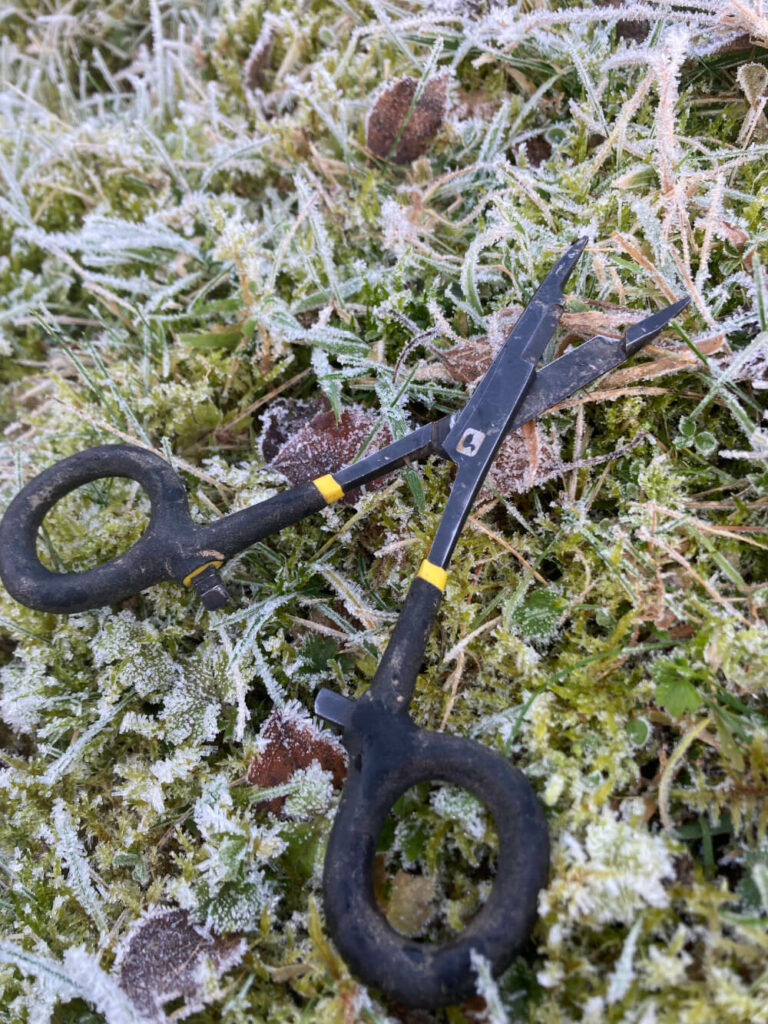
You will also find lots of forceps will have a tiny needle tucked away somewhere. This is used to put through the eye of the flies blocked up with finishing varnish that stops you threading your leader material through.
Fishing pliers and versions thereof are called haemostats in the USA.
Make sure you have them easily to hand and not buried away in a bag. The time you need them is when a fish is in the net — the exact moment you don’t have time to go searching.
Forceps can be clipped and secured on your jumper easily.
So there we have it – the absolute essentials for your first trip. You do not need anything else while you try fly-fishing out for size.
Hopefully, this has shown it does not have to break the bank to give it a go, either.
In Part 2: Enjoyed your first couple of trips so much you think it’s worth sticking with? These are the items you need as soon as you have decided you want to take fly-fishing up more seriously. Read Part 2 Here.
Tuition
I’ve written this series on the assumption that you are going solo on all of this, and hopefully, it’s given you something to think about before you take the leap. Go into it with half an idea of what’s coming, and you’ll find it far more enjoyable. Fly-fishing is an incredible hobby to have and will give you years of enjoyment.
You can skip all three of these blogs and just go straight into a Guided Day with an instructor. It saves buying anything, and you have someone to steer you in the right direction and save going the long way around making mistakes.
This is something I do myself, and while everyone who teaches will have a slightly different take on how to do it, it’s generally money well spent. It can fast-forward you to a decent level way quicker than you would just reading about it.
If you want to discuss a day, I am based in the North East of England and will be happy to answer any questions on how you may want to structure your day. It’s all very flexible to suit. Email me at [stuartingledew@yahoo.co.uk] or join [Stuart Ingledew Fly Fishing] on Facebook.
If you are based elsewhere, ask your local fishery for whom they recommend. Most will have a preferred list of Guides/Instructors who teach on their fishery regularly.
As a very rough guide to what you should expect from a guided day, the first thing is most will supply the tackle as part of the day’s fee. You would only need clothing to suit the weather and a pair of glasses.
For myself, I would include every bit of tackle from the rods and reels down to the flies and floatants at no extra cost.
You would have someone stood on your shoulder for the duration who could net, unhook and return the fish if that was something you were unsure of. But most of all, someone to put you right on where you are going wrong at all times. It’s a perfect way to introduce yourself to fly-fishing if you don’t want the hassle of buying a load of stuff and reading all these godforsaken blogs on how to get started.
Hope to see you on the bank soon.

